December 25, 2012

S'mores cupcakes


Santa wasn't getting cookies this year.


Merry Christmas!


This may be my favorite recipe to date...and that's saying a lot.


These s'mores cupcakes are filled with a graham cracker crust bottom, a chocolate cake middle, topped with a chocolate ganache glaze, graham cracker crust dusting, and finally a homemade toasted marshmallow topping. Yes, it's as delicious as it sounds.


I know this is a picture heavy post but they're just so gorgeous I had to keep snapping! I made them in both mini and regular form.


Now that is blow torch beautiful.


S'mores cupcakes
Adapted from bakersroyale
Makes 24 regular cupcakes/48 mini cupcakes

For the graham cracker crust
7 tablespoons of melted butter
1 1/2 cups of graham cracker crumbs

Mix these ingredients together and pat a little bit into the bottom of each cupcake tin. Press into the bottom of the tin and bake in a 350 degree oven for 10-15 minutes for regular cupcakes, 5-7 minutes for mini ones. 

For the chocolate cake
Here I took a shortcut: chocolate cake mix! You can go harder and use your favorite cake batter recipe but I used it from a box since I was in the midst of so much christmas baking. 

Fill your cupcake tins until it just covers your graham cracker crust. You don't want to over fill your tins as you want a relatively flat cupcake top for optimal glazing and frosting. Bake in a 350 degree oven until your cakes are done (this will depend on whether you're making full or half size cupcakes - bake according to your original recipe)

For the chocolate glaze
2/3 cup dark chocolate chips
2 tablespoons skim milk
4 tablespoons warm water
4 tablespoons powdered sugar

In a double boiler, melt your dark chocolate chips. Slowly add in your skim milk and water until it becomes a pourable consistency. Finally, whisk in your powdered sugar and incorporate everything over your double boiler. 

Remove from heat and let cool slightly

For the marshmallow topping
5 egg whites
1 1/2 cup sugar

Over your double boiler whisk together your egg whites and sugar until your mixture reaches 160 degrees F. Thermometer is highly suggested! Remove from heat and then mix with a hand mixer at high speed for 10-15 minutes until your mixture doubles in size and gets shiny, puffy, and forms semi-stiff peaks!

Putting it all together

1. Take your cooled cupcakes and flip them upside down to give them a swim in the chocolate glaze. Quickly plop them onto an assembly surface right side up and sprinkle some graham cracker crumbs on top for a festive look. 
2. Let your glaze set for 10-15 minutes. 
3. Pipe your marshmallow frosting onto your cupcakes with your pipping tip of choice! Have fun with this - squealing encouraged
4. Take a blow torch and toast your marshmallow topping until it's perfectly golden brown and given the most wonderful holiday touch to these adorable cupcakes. 

Enjoy!!

Sam


December 20, 2012

Cranberry hazelnut cookies


Okay okay I promise this is the last cranberry recipe! I promise, I promise.


These cookies have a delicious nutty aroma as they are chocked full of hazelnuts and yes, cranberries! The chocolate drizzle on top makes them look super fancy and adds another layer of sweetness.


They're super festive, super easy to make, and super perfect for a cookie swap or just to gift your taste buds this holiday season. See how chunky? So cute!


But I promise, my next post will be cranberry-less. But gosh, aren't these wonderful?


Cranberry Hazelnut Cookies
Adapted from lifetasteslikefood

1 stick unsalted butter at room temperature
1/2 cup granulated sugar
1/2 cup packed brown sugar
1 egg
1 teaspoon vanilla extract
1 1/4 cups all purpose flour
1/2 teaspoon baking soda
1/4 teaspoon salt
1 cup dried cranberries
1 cup roasted hazelnuts, chopped into small pieces
1/4 cup dark chocolate chips (optional)
1/4 cup white chocolate chips (optional)

Preheat the oven to 300 degrees.

Cream together your butter and sugars together. Slowly add egg and vanilla until well incorporated. Sift in your flour, baking soda and salt. Combine this well and then fold in your dried cranberries and nuts

Roll the dough into little 1 inch balls and place on a cookie sheet leaving room to spread (about 2 inches apart). Bake for 15 minutes or until the edges are just golden brown. I found that 15 was just perfect for me and I let the carry over cooking do the rest leading to still soft cookies!

Optional: if you want the nice chocolate drizzle, melt your two chocolates into two microwave safe bowls in 30 second increments until just melted. Plop into ziploc baggies and cut off tiny corners to make a makeshift piping bag. Drizzle and let set (it may take a few hours) - here's a tip to make it go faster: stir in just a smidgen of crisco (not even a smidgen, just a dot!) and it'll set up much much faster!

Enjoy!


Sam & Elyse (she came back to help with the chocolate!)


December 16, 2012

Cranberry White Chocolate Cheesecake Bites


It's so pretty!!! This is a continued take on last weeks holiday bars - I just love the way cranberry and white chocolate taste (and look!) together! There is white chocolate not only drizzled on top of these cuties, but also incorporated into the cheesecake filling. 


Also, I don't know about you guys, but I love when things are in miniature form. So this is the perfect dessert to serve buffet style, cocktail style, or just any way because you make it as a large sheet of cheesecake and cut it into little squares for sharing!


Although these may be harder to ship and share, they certainly will be welcome at any holiday event. To make things even cuter, I stuck them in some santa mini cupcake liners. Pretty cute right?


Beautiful, delicious, and most importantly of all - holiday baked goods!

Cranberry White Chocolate Cheesecake Bites
Adapted from cravingchronicles

Cranberry Jelly
1 lb whole cranberries
1 1/2 cups sugar
1/2 cup apple cider
Juice of 1/2 a lemon

Is it thanksgiving yet? Combine these ingredients in a saucepan over medium high heat until cranberries start to pop and break down. Pour through a mesh sieve to filter out the little cranberry skins and leave you with cranberry jelly! Pour your jelly into a container and put it into the fridge until your cheesecake is ready.

Cheesecake crust: I doubled the original recipe because I love crust. You can always half the recipe back to less crust.

8 tablespoons unsalted butter
1/2 cup dark chocolate chips
2 tablespoon cocoa powder
2 cups chocolate graham cracker crumbs

Prepare your cheesecake pan! Double line a 9x13 baking pan (or 8X8 if you want more cheesecake:crust ratio) with 2 layers of foil, taking care to leave extra foil hanging from the edges so that you can simply lift the entire cheesecake out later.

Over low heat, melt together the chocolate chips, unsalted butter, and cocoa powder. Once combined, remove from heat and stir in graham cracker crumbs and flatten this mixture onto the bottom of your prepared pan. Stick it into the freezer while you prep your cream cheese filling.

Cheesecake
16 ounces cream cheese softened to room temperature
2 large eggs
1/2 cup sugar
1 teaspoon vanilla extract
1 cup white chocolate chips, melted (melt in 30 second intervals in the microwave)

Preheat the oven to 325 degrees.

Whip up your cream cheese until it's nice and fluffy without lumps. Incorporate your eggs, sugar, and vanilla. Slowly add in your melted white chocolate chips.

Once it looks delicious, plop your cheesecake filling on top of the chocolate graham cracker crust and bake for 40-45 minutes and let cool in the fridge for at least 4 hours to overnight.

Putting it all together

Once your gorgeous cheesecake on top of chocolately crust has cooled, take about half of your cranberry jelly and melt in the microwave for 30 seconds. Stir your jelly until clump free and if you're feeling super meticulous, you can re-seive it. Spread this on top of your cream cheese filling and if you want, you can melt just a little more white chocolate and use the ziploc bag technique to swirl some white chocolate on top of the red jelly.

These guys are best stored in the fridge if they make it to the leftover stage (otherwise, prompt eating will do as well)

Enjoy!

Sam


December 9, 2012

Holiday Cranberry Bars


Hey there gorgeous. 


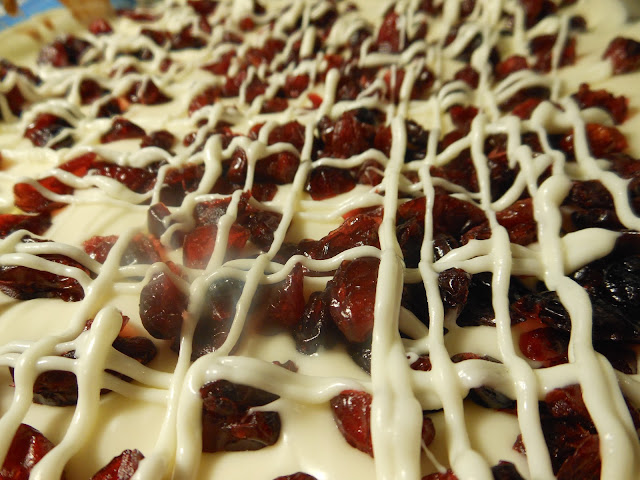
I know, it's been too long but trust me, there is a whole lot more where this came from. Holiday baking! It really may be my favorite thing of all time. This concoction encompasses everything that I love about this time of year.  Festive colors with a fruit of the season (cranberries!) and a white cream cheese frosting resembling the snow on the ground...all on a bed of blondie bar goodness.


Wait, but what's on top? (aside from a little fuzzy smear on my camera lens)

That would be white chocolate drizzle. It's a holiday favorite of mine and I can't wait to start baking up a storm. 


Oh hello blondie cross section photography. Who needs santa when you've got views like this?

Holiday Cranberry Bars
Blondies adapted from simplyrecipes

For the blondies:
1 cup of butter, melted
2 cups of tightly packed dark brown sugar
2 eggs, lightly beaten
2 teaspoons of vanilla
1 teaspoon of baking powder
1/4 teaspoon of baking soda
1/2 teaspoon of salt
2 cups of all purpose flour

Preheat the oven to 350 degrees.

Mix together the butter and brown sugar and then add in your eggs and vanilla. Sift in your baking powder, baking soda, salt, and flour. Mix until well combined and bake in a 9x13 inch pan for about 30-35 minutes until the whole pan is a gorgeous sheet of caramel baked goodness. You can always adjust the size of the pan and the baking time to make thicker or thinner blondies too. Let cool till room temperature and in the meantime...prepare your frosting!

For the cream cheese frosting:
8 ounces unsalted butter, at room temperature
8 ounces cream cheese, at room temperature
4 cups powdered sugar
1 teaspoon vanilla

Beat together your butter and cream cheese. Add in the powdered sugar one cup at a time until all incorporated. Throw in some vanilla and then spread evenly all over the blondies. Spatulas smoothing out frosting over a pan of blondies? Now that's the stuff the holidays are made out of!

For the white chocolate drizzle and holiday topping!
1/4 cup white chocolate chips
1 1/2 cup (or thereabouts) of dried cranberries

In a microwave safe bowl, melt your white chocolate chips in increments of 30 seconds in the microwave until completely melted (about 1 minute, 30 seconds). Don't over microwave as these chips are a tendency to glob together and become a mess so I'd err on the side of caution over zapping these cuties like crazy. Plop your melted mixture into the corner of a ziploc baggy and cut off the corner for a makeshift frosting bag!

Toss your cranberries on top of your cream cheese as you so desire (it looks so pretty!) and then get ready to drizzle your chocolate in any pattern your please right over your berries.

I hope you enjoy this recipe as much as I do! Let the holiday baking begin!

P.S. I recommend storing them in the fridge to allow for best cream cheese frosting consistency.


Sam


November 18, 2012

Fruit Tart


One of the reasons I love baking is how beautiful the products are. The gleam of a finished pumpkin pie, the perfectly crystallized top of a blueberry muffin, and the wonderful play of colors and shapes on cupcakes all make me swoon. But there is one baked good that tops them all in terms of gorgeousness (in my opinion) - the colorful fruit tart!


I love getting creative with the different patterns you can make with the different fruits on these tarts. That's not all! Brushing on a fruit glaze gives the fruit that irresistible sheen that stops me dead in my tracks every time I pass by one on display.


I made mine with a layer of chocolate on top of the sweet pastry crust to prevent the crust from getting soggy and to add another layer of visual appeal...also to add another layer of yum.


This may be one product that I enjoy looking at more than eating...although it's a pretty close race!

Fruit Tart
Adapted from joyofbaking

For the sweet pastry crust:
1 1/2 cups all purpose flour
pinch of salt
1/2 cup unsalted butter, room temperature
1/4 cup sugar
1 egg

Preheat your oven to 400F. Combine the butter with the sugar. Mix in the egg, salt and flour. Knead together until it comes into a ball and cover your dough with some saran wrap. Pop it into the fridge for 15-20 minutes. Mold your dough into a classic tart pan and prick the bottom and sides with a fork to prevent the crust from puffing up during baking. Pop it back into the fridge for another 15-20 minutes. Finally put your dough that is now in your tart pan into the oven and bake for about 15 minutes. Let cool.


Optional: if you want a layer of chocolate like I did, melt 1/2 cup of chips in the microwave for about 1 minute and spread over your cooled crust. Let this cool and harden by placing it in the freezer for a few minutes.


**Note I didn't use a classic tart pan since we were kindly gifted this pan with tart rimming and opted to use it instead**

For the pastry cream
1 1/4 cups milk (skim or whole)
1 teaspoon vanilla extract
3 large egg yolks
1/4 cup sugar
2 tablespoons all purpose flour
2 tablespoons cornstarch

This part is super fun! In a heat proof bowl, mix your egg yolks and sugar together until its a gorgeous pale yellow color. Sift the flour and cornstarch into the egg mixture and mix together. Set aside.

In a saucepan, heat up the milk and vanilla until it just starts to bubble. Remove it from the heat and very slowly add it to your egg mixture. Do this slow so that you don't end up with curdled eggs! If you do, it's okay you can strain it out. Pour this mixture now back into the saucepan and cook over medium heat until it's boiling but make sure you are whisking constantly. Once it's boiled, continue to whisk for another 30-60 seconds until the mixture has thickened into pastry cream!

Pour this into another bowl and immediately cover your pastry cream with foil. Make sure you lay your foil directly over your pastry cream to prevent the formation of a film on top. Cool to room temperature. Prior to using, re-whisk the mixture to remove any lumps that may have formed.

Assembling!
Assorted sliced fruits
1/2 cup apricot jam
1 tablespoon water

Layer your pastry cream over your crust (or chocolate). Now the best part: get creative layering different kinds of fruits all over your tart! Make circles, lines, or zig zags. Experiment with different colors and different fruits. Have fun!

To get that gorgeous glaze, heat the water and jam over medium high heat in a sauce pan and stir until your jam takes on a more liquid consistency. Brush this over your fruit toppings and enjoy!!


Sam

November 4, 2012

The Wedding Cupcakes

Things have been a little busy lately so the baking has been a little slow...but, I realized that I had not yet shared the final product of the wedding cupcakes that we had been working on over the past few months so here they are!


These cupcakes as you may remember, are the Dulce de leche Cupcakes  & 
Raspberry Ganache Chocolate Cupcakes.


My best friend and I got up super early to frost these babies that morning.  For me, the cupcakes were the star of the show!


The photos are taken by the most amazing photographer couple at: http://hotmetalstudio.com/

(go check them out!)


The cupcake stand was custom made to fit just the right amount of cupcakes and go with the color theme of red. They even made some holes at the top so that I could stuff some of the gerber daisies into the stand!


Hope you guys enjoy the pretty pictures!! Thank you hotmetalstudios!

Sam

October 20, 2012

Pumpkin Pie Bars


My husband is currently on the couch complaining that he is too tired from all of our fall activities. He did not however complain about this fall activity - not at all. This is a deliciously simple twist on the classically addictive pumpkin pie. 


Made into bar form and then topped with a crumb topping, these pumpkin pie bars are just like the pie - absolutely addictive. They're spiced just like the original so they won't fail to bring back the flavors of fall. One bite of these will remind you of how wonderful the changing fall colors look and how refreshing the crisp fall air smells. They are so good and they are so fall!


They smell so good baking in the oven as the crust bakes and gives off that delicious pastry smell. Then when the filling bakes, it gives off that autumnal scent of pumpkins, cinnamon, and soon to be yummy in everyone's belly. As usual, I recommend enjoying with a cup of warmed apple cider.

Yup, in case you can't tell. I'm still in love with fall.

Pumpkin Pie Bars
Adapted from somethewiser

For the crust
1 1/3 cup all purpose flour
1/2 cup brown sugar
8 tablespoons butter at room temperature

For the filling
8 oz room temperature cream cheese
3/4 cup sugar
1/2 cup pumpkin puree
2 eggs, slightly beaten
2 teaspoons cinnamon
1/2 teaspoon ground ginger
1/4 teaspoon ground cloves
1 teaspoon vanilla

Preheat your oven to 350 degrees. In your food processor, combine everything for the crust and just pulsate a few times until your mixtures resembles breadcrumbs. Reserve 2/3 of these crumbs for your topping. Take the remaining crumbs and press them evenly into a 8x11 (or around that size) baking dish. Bake this bottom layer for 15 minutes and allow to cool. It should look just slightly browned (and smell completely yummy). 

For the filling, combine all of your ingredients into your food processor and blend until completely smooth. Pour over your baked crust and then use your reserved crust crumbs to sprinkle on top for a crumb topping. Bake again at 350 for another 30-35 minutes or until the filling is firm and will withstand to cutting. 

Let your bars cool at room temperature and then cut into them! They'll be delicious, I promise!

Enjoy!

Sam

October 13, 2012

Cinnamon Raisin Swirl Bread


Well this was adorable.

Sam doesn't like/can't make yeast breads. Elyse loves/is awesome at making yeast breads. So we had a cooking lesson!!! We each donned on our own little aprons and Elyse did some teaching.


...and it was worth it. We'll both be making lots of breads now. Look at this! It was amazing to watch the loaves go through two risings, and fill the inside with sugar and then see the swirls of sugar when we ate them...everyday...for only a few days (because then it was gone).


These loaves were puffy, perfect, sweet, really hit a spot that only homemade bread can hit.


I mean, honestly. Who isn't a sucker for that?


Trust me, in keeping with the name of this blog - this cinnamon raisin bread isn't some wimpy white bread loaf with some raisins in it! It's sweet, it's sugary, it is dessert bread. It is worth making! Dare I say, eat it with a glass of warmed apple cider? Perfect fall snack!


Cinnamon Raisin Swirl Bread
Makes 2 loaves

For the bread
2/3 cup warm water (110 degrees F)
1-1/4 (0.25 ounce) package active dry yeast
2 eggs
1/3 cup butter, melted and slightly cooled
1 cup water
1/2 cup sugar
3/4 teaspoon salt
5-6 cups flour (half of which should be bread flour)
1 cup raisins

For the cinnamon sugar filling
1/3 cup granulated sugar
1/3 cup brown sugar
1 1/2 teaspoons cinnamon
3 tablespoons butter, melted

Combine 2/3 cup water with yeast and a couple tablespoons of the sugar. Set your remaining sugar aside for later. Set your yeast aside and watch it puff up and grow! This will take about 10 minutes depending on how warm your kitchen is. Meanwhile, combine eggs, 1 cup water, and melted butter. Combine 3 cups of flour, the rest of the sugar and salt. Add in your yeast mixture, which should be nice and frothy by now. Mix in the egg and butter mixture and stir in the rest of your flour until you have a pliable dough.

Knead for 5-10 minutes and allow your dough (which you can divide in two) to rise to about twice it's size in a warm place. Try the microwave! This should take about an hour.

Once your dough has doubled, punch it down and knead the raisins into the dough. This way you get beautiful raisins all throughout the bread, not just in the swirls! Roll dough balls into a rectangle so that the width side of the rectangle matches the length of your bread pan. We went for about 1/2 inch thick and it worked perfectly.

Spread the melted butter onto the rectangles and sprinkle liberally with cinnamon sugar. If you really like your bread sugary you can always add more! Roll your dough up from the width side until you reach the other end of the rectangle (think like a jelly roll, or a ho ho!). For pictures, see Elyse's post: here

Throw these guys into your bread pans that have been coated with some butter and let them rise one more time!

Finally, bake for about 30-40 minutes in a 350 degree oven until golden brown and sounds hollow! IT IS SO GOOD!!!! If you want you can drizzle with some confectioner's sugar glaze too, as you can see we did (depends on your sweet tooth).

Enjoy!

Elyse & Sam


Caramel Apples


Apples smothered with delicious homemade caramel...what could be better on a fall afternoon? The ingredients are quite basic. The only thing that really comes in handy is a digital thermometer, because it takes the guess work out of cooking until "soft ball stage." Just throw all the ingredients in the pan and cook until your thermometer reads 246 F. Add apples and enjoy!

Based on this recipe.

Ingredients
8 apples, washed and dried
8 chopsticks or popsicle sticks
2 cups of packed light brown sugar
1 3/4 cups heavy cream
3/4 cup corn syrup
2 tablespoons butter
1.5 teaspoons salt

For the caramel:
1. In a heavy pot (I used a copper pot), combine light brown sugar and the rest of the ingredients through the salt.
2. Set heat to medium and cook until it reaches 246 F. A digital thermometer really does work best to monitor the temperature accurately. The mixture will be very bubbly so be careful!
3. Take pot off heat. Skewer your apples with the chopsticks/popsicle sticks. Swirl the apples into the caramel and place on a heat proof plate or baking sheet lined with parchment paper.


4. You could drizzle with chocolate, dip in chocolate chips or chopped nuts...whatever you want!


Enjoy!

                                                                                                                        ~Elyse


October 5, 2012

Nutella Stuffed Brown Butter Cookies

Sooooo this happened. 

These cookies are amazing. Their butter components are browned and thus giving the dough an uh-maize-ing nutty aroma to it. Seriously, amazing.


Then in goes not one, but two types of chocolate chip. Then they're stuffed.with.nutella. 


Reminiscent of the red velvet cookies of yore, these stuffed cookies are a chocolate-y, nutty, amazing, bite of delight.


And that's not all, then they're topped with sea salt - giving you that sweet and salty combination that we all know and love. So good, they're deliciousness can only be described by taste, words just don't do it justice!


Nutella Stuffed Brown Butter Cookies
Adapted from: ambitiouskitchen

2 1/4 cup all-purpose flour
1 1/4 teaspoons baking soda
1/4 teaspoon salt
2 sticks (1 cup) unsalted butter
1 1/4 cup packed dark brown sugar
1/4 cup granulated sugar
1 large egg and 1 egg yolk
1 1/2 teaspoon vanilla extract
1 tablespoon plain greek yogurt
3/4 cup semi-sweet chocolate chips
1/2 cup dark chocolate chips
1 jar nutella
sea salt (for sprinkling) - optional

1. Brown the butter: in a small saucepan, heat your 2 sticks of butter on medium heat while constantly whisking. The butter will turn foamy, and then clear. Shortly after, the sides and bottom of your saucepan will start to be coated with a brown colored butter product and your saucepan will start to smell like toasted, nutty, caramel, autumn goodness (I was so happy to smell this smell). As soon as this happens, turn off the heat and pour your butter in a bowl to let it cool for a few minutes.

2. Make the dough: once your butter has cooled a bit, add in your sugars. Then drop in the egg, extract, and yogurt. Mix until well incorporated. Add in your flour, baking soda, and salt. Fold in your two chocolates and chill for 2 hours in the fridge.

3. Stuffing the cookies: once your dough is slightly chilled, take out a whopping tablespoon or so and flatten the dough out into little pancakes into your hand. Then, drop some nutella in the middle. I used a 1/4 teaspoon measuring spoon to dollop some into the cookie. Carefully fold over the sides of the cookie dough making a little nutella dumpling. The key is to make your cookie pancake nice and big, but not too thin. That way when you roll the dough around the nutella, you'll ensure a good seal.

4. Baking & salting the cookies: bake the cookies about 1 inch apart in a 375 degree oven for about 9 minutes. Take them out even if they don't look quite done and let carry over cooking do the rest. As soon as they are out, sprinkle with a little bit of salt and press down the tops of the cookies to flatten (and pressing in the salt as well!) with the back of a spoon! Let them cool and then...

5. Eating the cookies: just make sure you lick any residual nutella off your fingers.


Enjoy!!

Sam