February 8, 2013

Caramel Brownies

This recipe was emailed to me and well, it looked plain delicious. Not the kind of recipe I pick for aesthetic glory (although it is pretty) but more for the plain fact that it's a kind of baked good that is so full of taste bud happiness that it saturates your mind with sugary bliss. 


These brownies are easy to make and filled with caramel. You split half of the batter to bake for a few minutes whiles preparing the caramel filling and then pour on the caramel and the rest of the batter.


The end result? The perfect fudgy brownie, you know the kind with that crackly top, around a gooey caramel filling. If you'd want to make it even yummier, add nuts. Next time, I think I'll add peanuts into the brownie batter to make it more like a snickers bar!

Caramel Brownies
Adapted from tasteofhome

2 cups sugar
3/4 cups cocoa powder
1 cup canola oil
4 eggs
1/4 cup milk
1 1/2 cups flour
1 teaspoon salt
1 teaspoon baking powder
1 cup semi-sweet chocolate chips
14 ounces caramels
1 (14 ounces) can sweetened condensed milk


Preheat your oven to 350 degrees and grease a 9x13 inch pan

Combine your sugar, cocoa powder, eggs and milk in a bowl. In a separate bowl, mix the flour, salt, and baking powder. Slowly add your cocoa powder mix to the flour mix until fully incorporated. Fold in your chocolate chips (and if you'd like, add in 1 cup of nuts of your choice)

Take about 1/2 of your batter and pour it into the bottom of your prepared pan, bake for 12 minutes. During this time heat on med-low heat the caramels and condensed milk. Stir continuously until the caramels are melted. Be careful not to turn the heat up too high or it will burn the mixture. Once your brownies and caramel are done, take the brownie pan out and pour the caramel onto you bottom layer. Then, spoon and spread the remaining batter around the top of the caramel. You can use a knife to smooth the batter to make another layer of brownie dough on top. Bake the rest of the pan for 35-40 minutes.

Enjoy!

Sam

January 27, 2013

Whole Wheat No-Knead Bread


Winter means scarves, hot chocolate, and most importantly - hearty food. For me, that means warm soups and big loaves of crusty soul warming bread. So for this post, it's still a baked good but it's a savory recipe!


My mother in law makes the most amazing no-knead bread. I'm absolutely in love with it and since my best friend gave me a dutch oven this year, I've been playing with the no-knead bread phenomenon. This recipe is a whole-wheat version so there's less rise than the traditional white loaf (which is pictured below - in instagram form).


By far, the best part of this recipe is the amazing, amazing crust that comes from this bread. Given that it's no-knead, this bread recipe is perfect for setting and forgetting. The time it takes for different rises is incredibly variable and perfect to fitting around any busy day.


My husband has an insatiable sweet tooth, although to his credit - nutella on this loaf is fantastic. Just one of many ways to eat this bread. The original loaf that I'm in love with is from another cook-book but the variation I'll share with you is a mixture of Mark Bittman's version and the Mother in law version. Hope you guys enjoy!

Whole Wheat No-Knead Bread
Adapted from: How to Cook Everything

4 cups bread flour (2 cups whole wheat, 2 cups white)
2 cups + 3 tablespoons tap water at about 70 F
1 teaspoons salt
1/2 teaspoon yeast

Mix together the flour, salt, and yeast. Add your water and stir vigorously until combined. It won't look like a typical loaf - more of a very thick pancake batter consistency. Don't worry - this recipe is incredibly forgiving. Now here's the best part - you can let it rise one of three ways and just do whatever works best for your schedule! Simply cover your bowl with saran wrap and pick one.

1. (For best flavor). Let rise at room temperature for 18-24 hours until about twice in size and the top of your dough is covered in bubbles (soon to turn into crust)
2. Let rise for 2 hours or until doubled at a warm spot in your house
3. Let rise for 1.5-2 hours in the microwave. Microwave a cup of water for about 2 minutes and plop your bowl of dough into the microwave with the cup of water and shut the door. The remaining steam from the water will speed up the rising process.

After this rise, flatten the dough a bit by folding down the edges with an oiled spatula and then pick another rise!

Heat your oven to 450F and put your dutch oven into the oven while it's preheating. You can use another pot as long as it has a good seal on the lid. Something cast iron is ideal. If you have a dutch oven, use it! Once your oven has preheated to 450, your dutch oven should be steaming hot. Take it out of the oven with mittens and very carefully plop your dough (which should have finished it's second rise by now) into the hot dutch oven. Be careful not to deflate your puffy dough!

Spritz the top of your loaf with some water and place the lid back onto the dutch oven.

Reduce the heat to 425 and bake for 50-55 minutes. Remove your dutch oven from your oven and take the lid off. Let your loaf cool and then slice into it. It's absolutely delicious, hearty, and wintery.

Note: The all white flour version gives a much airier, puffier loaf. The whole wheat version gives a denser (although more flavorful) loaf. Play around with it!

Enjoy!

Sam

January 13, 2013

Lemons!


I recently bought a surplus of lemons, so I thought I would share two of my favorite lemon desserts!

Lemon Bars
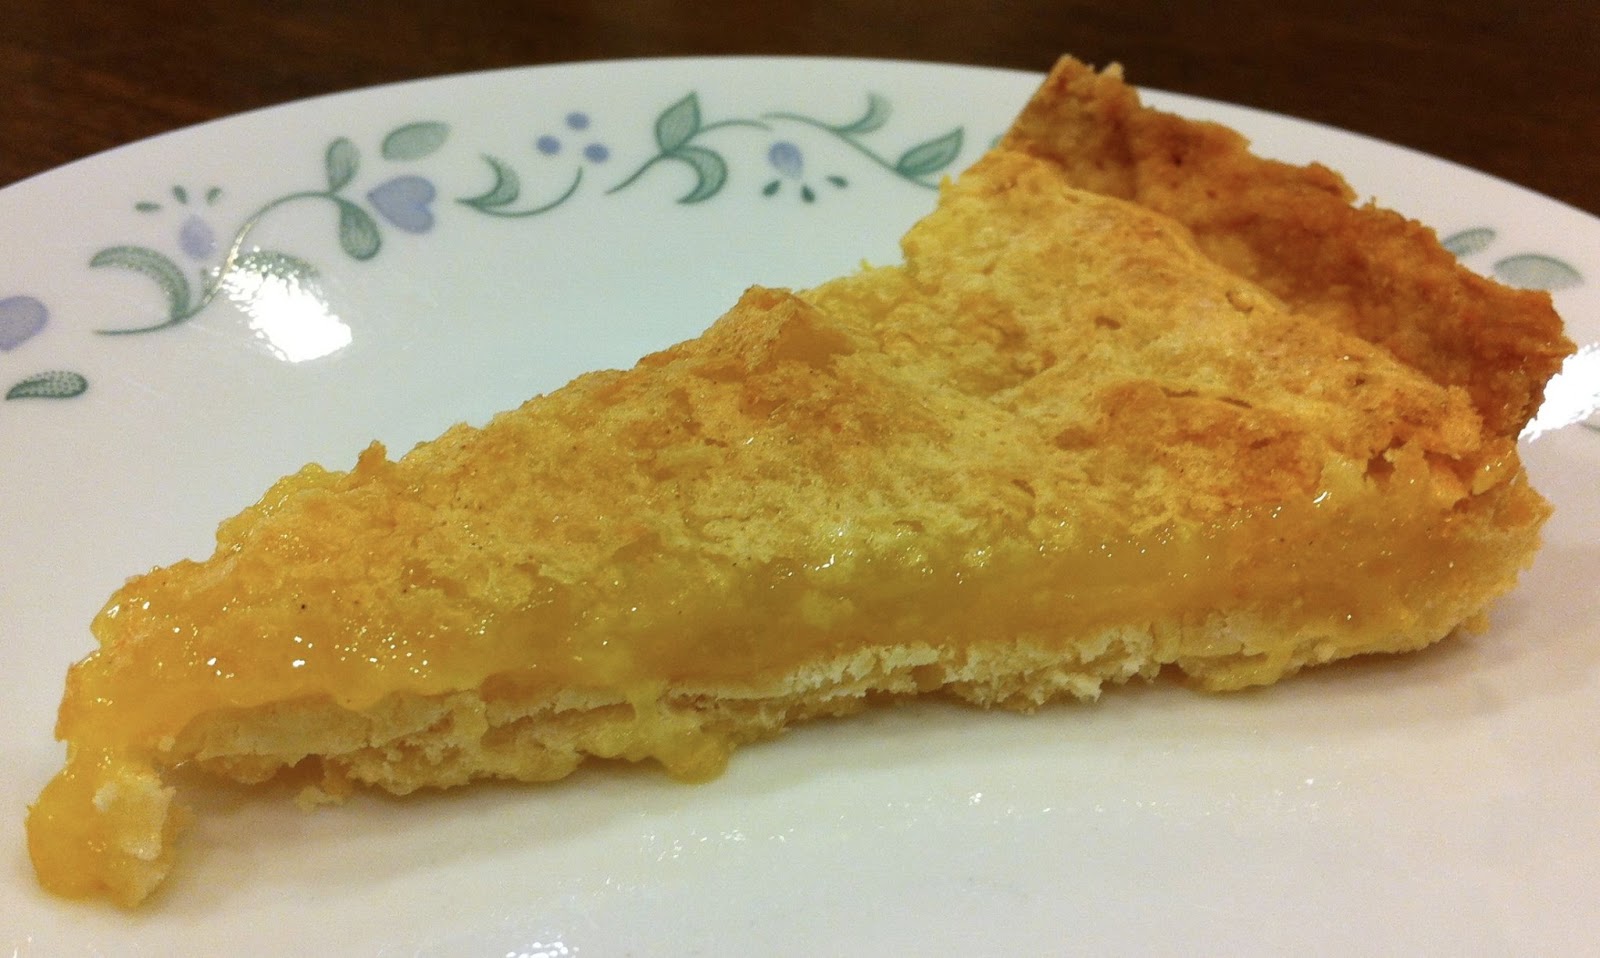
These quintessential lemon bars are even prettier, and just as delicious, when made in a tart pan! And surprisingly simple to make.


Recipe from Betty Crocker 

Crust
1 cup all purpose
½ cup (1 stick) butter, softened
¼ cup powdered sugar

Filling
2 eggs
1 cup granulated sugar
Lemon peel grated, from 1 lemon
2 tablespoons fresh lemon juice
½ teaspoon baking powder
¼ teaspoon salt

Mix the crust ingredients together (I use my hands) until crumbly. Press into an ungreased 8 or 9 inch square baking dish, or a tart pan if you have it.

Beat the filling ingredients together until light and fluffy, about 3 minutes with an electric mixer. Or you can use a whisk and do it by hand if you want an added arm workout.

Bake in a preheated 350 degree oven for 25 minutes.

Cut into pieces and enjoy!


Lemon Sponge Pudding
These little cups are unlike any other dessert I’ve made. While they bake, a layer of tart lemon pudding forms on the bottom, and a spongy meringue like layer rises to the top…amazing!

Recipe developed from Martha Stewart 

Ingredients
3 tablespoons butter, softened
2/3 cup granulated sugar
3 eggs, separated
3 tablespoons all purpose flour
1 cup milk (can be skin through whole milk)
6 tablespoons freshly squeezed lemon juice (you’ll need 2 or 3 lemons)
2 tablespoons lemon zest (I used the zest of 2 lemons)

In a medium to large bowl, beat just the egg whites with an electric mixture until stiff peaks form. Do this step first so you’ll have clean, ungreasy beaters (any trace of butter or yolk on the beaters will interfere with fluffy egg whites!).

In another medium to large bowl, beat together the butter and sugar. Add the egg yolks and flour. Stir in the milk, lemon juice, and 2 tablespoons zest.

Take the beaten eggs whites and fold them into the lemon yolk mixture. You’ll get an essentially homogenous mixture. Ladle this into 8 to 12 ramekins (so cute!).

Place the ramekins in a roasting dish, and pour boiling water up to about half the up the sides of the ramekins. Bake in a preheated 325 degree oven for 25 minutes.


Remove ramekins from pan and cool. Enjoy!

Elyse 

December 25, 2012

S'mores cupcakes


Santa wasn't getting cookies this year.


Merry Christmas!


This may be my favorite recipe to date...and that's saying a lot.


These s'mores cupcakes are filled with a graham cracker crust bottom, a chocolate cake middle, topped with a chocolate ganache glaze, graham cracker crust dusting, and finally a homemade toasted marshmallow topping. Yes, it's as delicious as it sounds.


I know this is a picture heavy post but they're just so gorgeous I had to keep snapping! I made them in both mini and regular form.


Now that is blow torch beautiful.


S'mores cupcakes
Adapted from bakersroyale
Makes 24 regular cupcakes/48 mini cupcakes

For the graham cracker crust
7 tablespoons of melted butter
1 1/2 cups of graham cracker crumbs

Mix these ingredients together and pat a little bit into the bottom of each cupcake tin. Press into the bottom of the tin and bake in a 350 degree oven for 10-15 minutes for regular cupcakes, 5-7 minutes for mini ones. 

For the chocolate cake
Here I took a shortcut: chocolate cake mix! You can go harder and use your favorite cake batter recipe but I used it from a box since I was in the midst of so much christmas baking. 

Fill your cupcake tins until it just covers your graham cracker crust. You don't want to over fill your tins as you want a relatively flat cupcake top for optimal glazing and frosting. Bake in a 350 degree oven until your cakes are done (this will depend on whether you're making full or half size cupcakes - bake according to your original recipe)

For the chocolate glaze
2/3 cup dark chocolate chips
2 tablespoons skim milk
4 tablespoons warm water
4 tablespoons powdered sugar

In a double boiler, melt your dark chocolate chips. Slowly add in your skim milk and water until it becomes a pourable consistency. Finally, whisk in your powdered sugar and incorporate everything over your double boiler. 

Remove from heat and let cool slightly

For the marshmallow topping
5 egg whites
1 1/2 cup sugar

Over your double boiler whisk together your egg whites and sugar until your mixture reaches 160 degrees F. Thermometer is highly suggested! Remove from heat and then mix with a hand mixer at high speed for 10-15 minutes until your mixture doubles in size and gets shiny, puffy, and forms semi-stiff peaks!

Putting it all together

1. Take your cooled cupcakes and flip them upside down to give them a swim in the chocolate glaze. Quickly plop them onto an assembly surface right side up and sprinkle some graham cracker crumbs on top for a festive look. 
2. Let your glaze set for 10-15 minutes. 
3. Pipe your marshmallow frosting onto your cupcakes with your pipping tip of choice! Have fun with this - squealing encouraged
4. Take a blow torch and toast your marshmallow topping until it's perfectly golden brown and given the most wonderful holiday touch to these adorable cupcakes. 

Enjoy!!

Sam


December 20, 2012

Cranberry hazelnut cookies


Okay okay I promise this is the last cranberry recipe! I promise, I promise.


These cookies have a delicious nutty aroma as they are chocked full of hazelnuts and yes, cranberries! The chocolate drizzle on top makes them look super fancy and adds another layer of sweetness.


They're super festive, super easy to make, and super perfect for a cookie swap or just to gift your taste buds this holiday season. See how chunky? So cute!


But I promise, my next post will be cranberry-less. But gosh, aren't these wonderful?


Cranberry Hazelnut Cookies
Adapted from lifetasteslikefood

1 stick unsalted butter at room temperature
1/2 cup granulated sugar
1/2 cup packed brown sugar
1 egg
1 teaspoon vanilla extract
1 1/4 cups all purpose flour
1/2 teaspoon baking soda
1/4 teaspoon salt
1 cup dried cranberries
1 cup roasted hazelnuts, chopped into small pieces
1/4 cup dark chocolate chips (optional)
1/4 cup white chocolate chips (optional)

Preheat the oven to 300 degrees.

Cream together your butter and sugars together. Slowly add egg and vanilla until well incorporated. Sift in your flour, baking soda and salt. Combine this well and then fold in your dried cranberries and nuts

Roll the dough into little 1 inch balls and place on a cookie sheet leaving room to spread (about 2 inches apart). Bake for 15 minutes or until the edges are just golden brown. I found that 15 was just perfect for me and I let the carry over cooking do the rest leading to still soft cookies!

Optional: if you want the nice chocolate drizzle, melt your two chocolates into two microwave safe bowls in 30 second increments until just melted. Plop into ziploc baggies and cut off tiny corners to make a makeshift piping bag. Drizzle and let set (it may take a few hours) - here's a tip to make it go faster: stir in just a smidgen of crisco (not even a smidgen, just a dot!) and it'll set up much much faster!

Enjoy!


Sam & Elyse (she came back to help with the chocolate!)


December 16, 2012

Cranberry White Chocolate Cheesecake Bites


It's so pretty!!! This is a continued take on last weeks holiday bars - I just love the way cranberry and white chocolate taste (and look!) together! There is white chocolate not only drizzled on top of these cuties, but also incorporated into the cheesecake filling. 


Also, I don't know about you guys, but I love when things are in miniature form. So this is the perfect dessert to serve buffet style, cocktail style, or just any way because you make it as a large sheet of cheesecake and cut it into little squares for sharing!


Although these may be harder to ship and share, they certainly will be welcome at any holiday event. To make things even cuter, I stuck them in some santa mini cupcake liners. Pretty cute right?


Beautiful, delicious, and most importantly of all - holiday baked goods!

Cranberry White Chocolate Cheesecake Bites
Adapted from cravingchronicles

Cranberry Jelly
1 lb whole cranberries
1 1/2 cups sugar
1/2 cup apple cider
Juice of 1/2 a lemon

Is it thanksgiving yet? Combine these ingredients in a saucepan over medium high heat until cranberries start to pop and break down. Pour through a mesh sieve to filter out the little cranberry skins and leave you with cranberry jelly! Pour your jelly into a container and put it into the fridge until your cheesecake is ready.

Cheesecake crust: I doubled the original recipe because I love crust. You can always half the recipe back to less crust.

8 tablespoons unsalted butter
1/2 cup dark chocolate chips
2 tablespoon cocoa powder
2 cups chocolate graham cracker crumbs

Prepare your cheesecake pan! Double line a 9x13 baking pan (or 8X8 if you want more cheesecake:crust ratio) with 2 layers of foil, taking care to leave extra foil hanging from the edges so that you can simply lift the entire cheesecake out later.

Over low heat, melt together the chocolate chips, unsalted butter, and cocoa powder. Once combined, remove from heat and stir in graham cracker crumbs and flatten this mixture onto the bottom of your prepared pan. Stick it into the freezer while you prep your cream cheese filling.

Cheesecake
16 ounces cream cheese softened to room temperature
2 large eggs
1/2 cup sugar
1 teaspoon vanilla extract
1 cup white chocolate chips, melted (melt in 30 second intervals in the microwave)

Preheat the oven to 325 degrees.

Whip up your cream cheese until it's nice and fluffy without lumps. Incorporate your eggs, sugar, and vanilla. Slowly add in your melted white chocolate chips.

Once it looks delicious, plop your cheesecake filling on top of the chocolate graham cracker crust and bake for 40-45 minutes and let cool in the fridge for at least 4 hours to overnight.

Putting it all together

Once your gorgeous cheesecake on top of chocolately crust has cooled, take about half of your cranberry jelly and melt in the microwave for 30 seconds. Stir your jelly until clump free and if you're feeling super meticulous, you can re-seive it. Spread this on top of your cream cheese filling and if you want, you can melt just a little more white chocolate and use the ziploc bag technique to swirl some white chocolate on top of the red jelly.

These guys are best stored in the fridge if they make it to the leftover stage (otherwise, prompt eating will do as well)

Enjoy!

Sam


December 9, 2012

Holiday Cranberry Bars


Hey there gorgeous. 


I know, it's been too long but trust me, there is a whole lot more where this came from. Holiday baking! It really may be my favorite thing of all time. This concoction encompasses everything that I love about this time of year.  Festive colors with a fruit of the season (cranberries!) and a white cream cheese frosting resembling the snow on the ground...all on a bed of blondie bar goodness.


Wait, but what's on top? (aside from a little fuzzy smear on my camera lens)

That would be white chocolate drizzle. It's a holiday favorite of mine and I can't wait to start baking up a storm. 


Oh hello blondie cross section photography. Who needs santa when you've got views like this?

Holiday Cranberry Bars
Blondies adapted from simplyrecipes

For the blondies:
1 cup of butter, melted
2 cups of tightly packed dark brown sugar
2 eggs, lightly beaten
2 teaspoons of vanilla
1 teaspoon of baking powder
1/4 teaspoon of baking soda
1/2 teaspoon of salt
2 cups of all purpose flour

Preheat the oven to 350 degrees.

Mix together the butter and brown sugar and then add in your eggs and vanilla. Sift in your baking powder, baking soda, salt, and flour. Mix until well combined and bake in a 9x13 inch pan for about 30-35 minutes until the whole pan is a gorgeous sheet of caramel baked goodness. You can always adjust the size of the pan and the baking time to make thicker or thinner blondies too. Let cool till room temperature and in the meantime...prepare your frosting!

For the cream cheese frosting:
8 ounces unsalted butter, at room temperature
8 ounces cream cheese, at room temperature
4 cups powdered sugar
1 teaspoon vanilla

Beat together your butter and cream cheese. Add in the powdered sugar one cup at a time until all incorporated. Throw in some vanilla and then spread evenly all over the blondies. Spatulas smoothing out frosting over a pan of blondies? Now that's the stuff the holidays are made out of!

For the white chocolate drizzle and holiday topping!
1/4 cup white chocolate chips
1 1/2 cup (or thereabouts) of dried cranberries

In a microwave safe bowl, melt your white chocolate chips in increments of 30 seconds in the microwave until completely melted (about 1 minute, 30 seconds). Don't over microwave as these chips are a tendency to glob together and become a mess so I'd err on the side of caution over zapping these cuties like crazy. Plop your melted mixture into the corner of a ziploc baggy and cut off the corner for a makeshift frosting bag!

Toss your cranberries on top of your cream cheese as you so desire (it looks so pretty!) and then get ready to drizzle your chocolate in any pattern your please right over your berries.

I hope you enjoy this recipe as much as I do! Let the holiday baking begin!

P.S. I recommend storing them in the fridge to allow for best cream cheese frosting consistency.


Sam